Sony’s straight-out-of-camera colors aren’t pleasing enough, and when grading, you need to handle things differently depending on the mode you chose when shooting. Most online examples use sLog2 or sLog3 for grading; the dynamic range is higher, but there may also be more work to do in post. Maybe applying a conversion LUT can get you a quick result, but that’s beyond the scope of this article. This article mainly focuses on the workflow for HLG mode.
HLG shooting mode
The advantage of HLG shooting mode is that, even straight out of camera, it can still offer a wider color range than normal out-of-camera footage (such as cine). Since the color space becomes BT.2020, when we import this footage into FCPX, we need to convert the color space, otherwise it will look overexposed.
You get HLG mode by changing the picture profile (pp value) in the MR position:

Color grading workflow
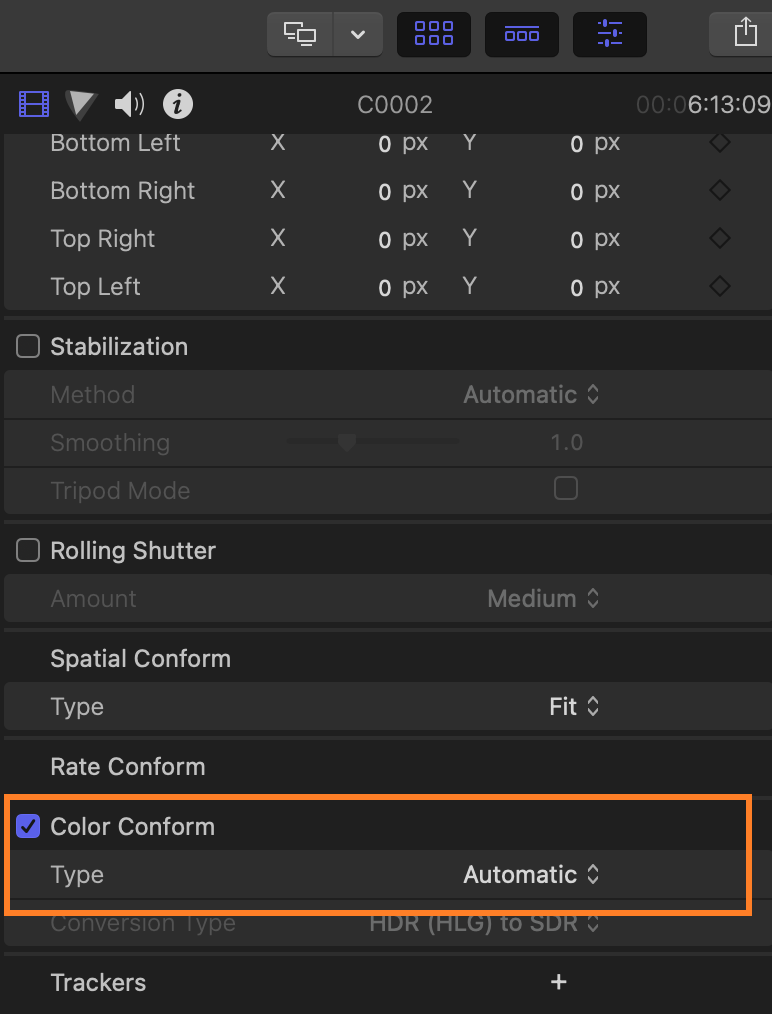
Convert color space (newer versions of FCPX automatically turn on Color Conform to convert from HLG to Rec.709 for us)
Primary grading
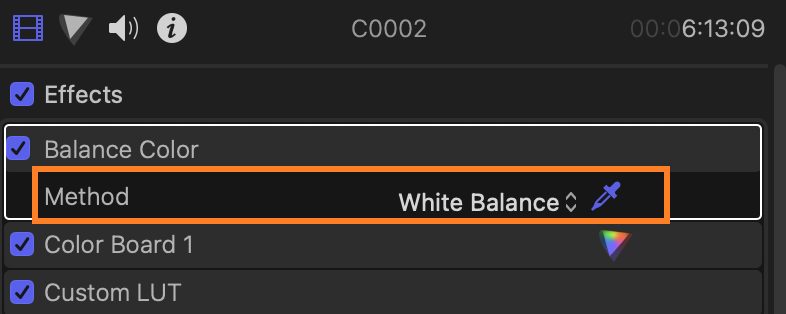
Basic white balance: you can use balance color to easily fix the color balance; if the result isn’t ideal, find balance color in the inspector panel, switch from automatic to manual mode, and use the eyedropper to pick a white point in the frame.

Advanced white balance: use the color curve and color wheel together with the waveform scope to make manual adjustments. The goal is to make the red, green and blue in the waveform overlap as much as possible and turn white. But it still depends on the actual frame; for example, skin tones will have a bit more red, which is normal.
Exposure: pull the highlights to near 100 and the shadows to near 0, then adjust the midtones based on the image. If you run into a high-contrast situation, such as a very bright sky but a very dark subject, you can use the hue/saturation curves to select the bright areas based on luma, pull back the overexposed areas, and then continue adjusting the whole image.
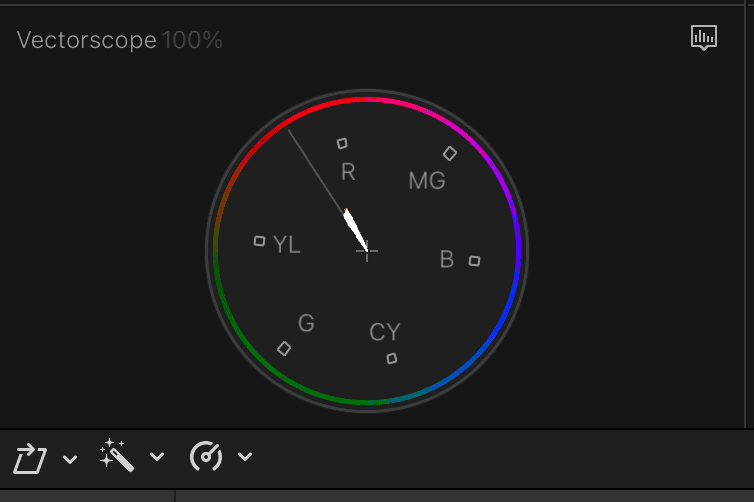
Saturation: adjust to taste, but I suggest not pushing it too far from the center of the vectorscope, to leave some room for secondary grading.
Secondary grading, aka applying a LUT
This step is the simplest: find a LUT you like and drag it onto the clip. If the effect is too strong, you can fix that by adjusting the mix percentage.
Restoring skin tones
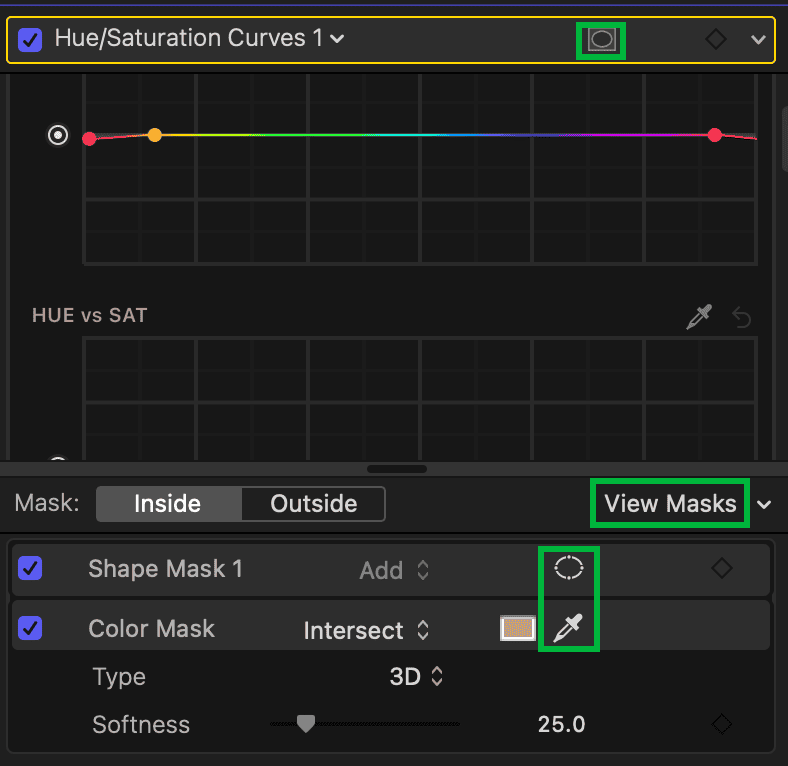
After secondary grading, skin tones may become distorted. We need to drag to select the skin area (or the orange area at the bottom) in the Hue/Saturation Curves and adjust the skin tone so it sits as close as possible to the 10:30 line.
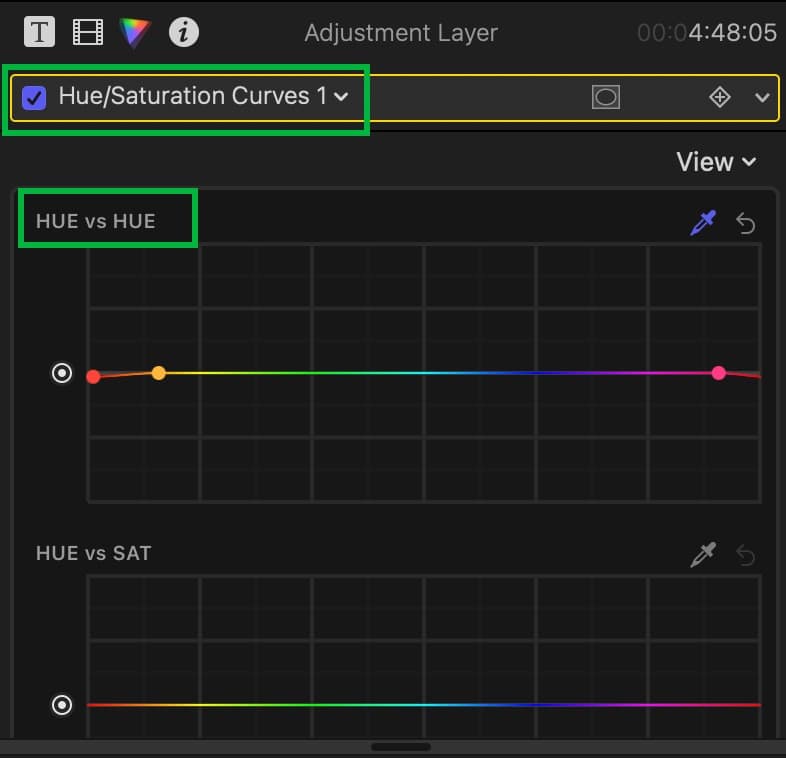
HUE vs HUE: changes the color of the selected color range; HUE vs SAT: changes the saturation of the selected color range; HUE vs LUMA: changes the luma of the selected color range; LUMA vs SAT: changes the saturation of the selected luma range; SAT vs SAT: changes the saturation of the selected saturation range; ORANGE vs SAT: changes the saturation of the orange range (similar to skin tones).
If other colors are the same as the skin tone, you’ll also need to create a mask to make sure that when we adjust the skin tone, we don’t change the color of other objects.
-
Previous
24/7 Livestreaming with a Raspberry Pi -
Next
10 Core Tips for Boosting Efficiency in Claude Code